![]()
Welcome to the Modeler's Gallery |
|
||||
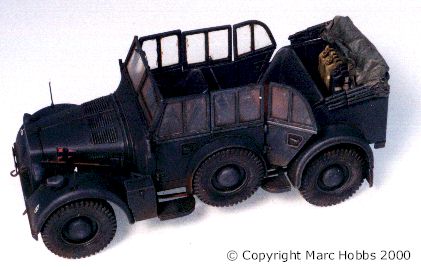
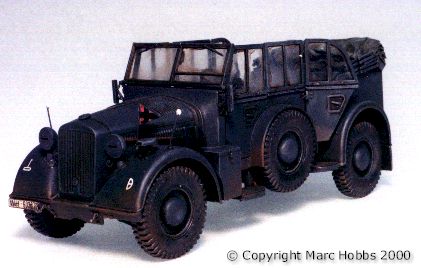
Italeri Horch Staff Car SdKfz 15 - Building the modelThe BodyThe car body goes to together nicely, however, there is a prominent seam that runs
around the car between the floorboard and the sides and rear. Unfortunately there is a lot
of nice texture molded into the floor that I did not want to loose by sanding. A technique
that works well for tight corners like this is to mask off area with the detail (in this
case the tread plate on the floor) and then airbrush about This is a fine leveling compound, so as it dries it fills the seam and leaves a smooth surface (i.e. no sanding!). It takes three or four coats to build up, but it is a lot easier and cleaner. I used the same technique later on the rear fenders and to blend the bonnet into the front fenders. It is a real time saver. The seat cushions are molded open on the bottom and they overhang enough that, if you look carefully, you can see into them after the seats are installed. So, I blocked off the bottoms with sheet styrene, painted them Testor's Leather, and set them aside until after painting the rest of the car. I dressed up the dashboard by thinning down the kit part, drilling out the instruments and filling in the holes with an instrument made by layering an aircraft decal between a piece of clear acetate and sheet styrene. The decals were from the Revell/Monogram Pro Modeler 1/48 Bomber Instrument Panels and the acetate is a piece of an overhead transparency. Getting the bonnet to fitThe only real fit problem on the model is in step 4 when installing the bonnet. The bonnet is molded in five parts and it takes a little finesse to get it all together. Do not follow the assembly order suggested in the instructions. First, I put thin plastic shims on the ends of the bonnet sides (parts 46 & 47). Then I glued the entire bonnet together (parts 19, 46, 47 & 50) and glued all this to the frame (parts 54). The shims help to hold the alignment so you can square everything up then the hood (part 48) drops right into place. There should be seams between the hood and the bonnet sides. However there are not
seams between the bonnet and the front car body (parts 19). Again I Also note that Italeri does not provide any engine (not even a faux bottom), so I dropped in the bottom of the engine from an old Tamiya SdKfz 250 halftrack just so the frame doesn't look empty from the bottom (of course do this before gluing on the hood). To prevent breakage during construction, I generally leave off any small detail parts until the model is ready to paint, so I move on to the chassis. The ChassisThe chassis provides the greatest opportunity for detailing, unfortunately, unless you display the model on a mirror, you can't see most of it. Still, if you must, refer to page 19 of the Schiffer book for a photo of the chassis taken from the maintenance manual. The photo is pretty blurry, but most of the detail you need is right there. The first step is to clean up the frame (part 54), as there are quite a few punch-out marks along the frame and inside the wheel wells. There is also an Italeri logo and the words "Made in Italy" molded on the bottom of the auxiliary fuel tank. If you expect the model will be judged at a contest, you will want to remove this as well. There are seven lightening holes along each side of the frame. I drilled these in with
Dremel tool and then cleaned them up with some files. I also drilled small holes into the
backs of the middle axles (it is a small detail, but you can see it from the inside of the
car body). It is interesting to note that on these vehicles, The all wheel independent suspension sub assemblies are little gems, but beware, they are fragile. There are some mold seams on the springs and some punch out marks on the wheel discs that are a pain to clean uparts I also found it handy to "trap" parts 59 and 66 without gluing them in place. This procedure helps to align the wheel discs later so your wheels don't end up canted. Now you can detail away. I made the sides to the fuel tanks from sheet plastic (now that you can see them through the lightening holes), added fuel lines, brake lines and electrical wiring from solder and detailed the frame and gear box with Grandt line bolts and bits of plastic. One easy detail that really dresses up the chassis is to add thin strips of plastic around the edges of the footsteps and some Grandt line bolts on the bottom of the supports. This adds some depth and it is actually visible from the sides.
|
|
||||
Copyright 2000 -
Austin Armor Builders Society
All rights reserved.
Web design and maintenance:
Andrew Martin Web Design